
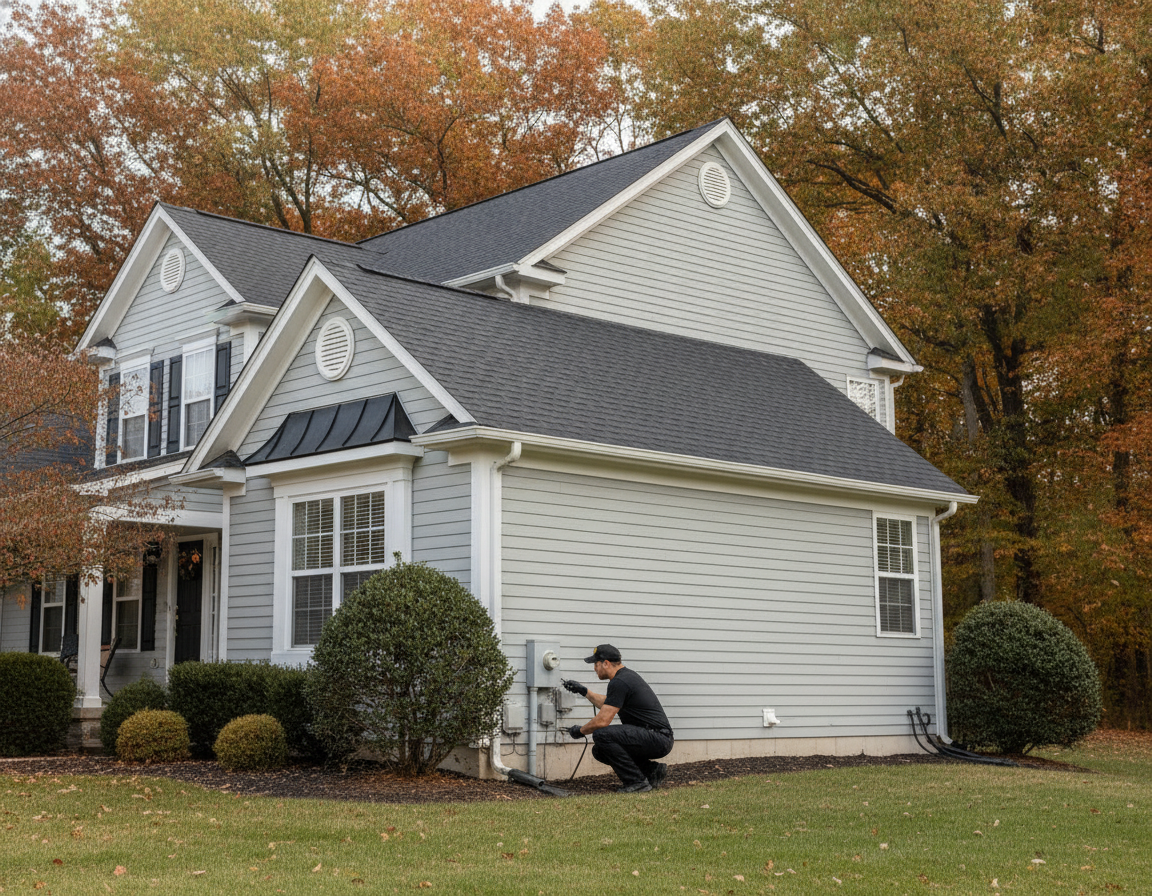
Rodent exclusion methods are the set of building upgrades that block mice and rats from entering your home. They focus on sealing entry points, screening vents, and hardening doors—before relying on traps or bait. For Oshawa homeowners, exclusion cuts repeat infestations and protects wiring, insulation, and food areas for the long term.
By Krunal Agarwal — Bugman Plus
Last updated: July 4, 2026
Overview at a Glance
Rodent exclusion keeps mice and rats out by sealing gaps 1/4–1/2 inch, screening vents with hardware cloth, installing tight door sweeps, and maintaining sanitation. Done correctly, it prevents most indoor activity before traps are needed, reduces damage risk, and supports safer, warranty-backed treatments.
Here’s the quick view of what you’ll learn and use right away.
- What rodent exclusion is: A prevention-first, building-tightening approach.
- Why it matters: Fewer infestations, less damage, better hygiene.
- How it works: Find entry points, choose the right materials, seal and monitor.
- Proven methods: Door sweeps, weatherstripping, hardware cloth, sealants, vent screens.
- Action steps: A step-by-step checklist you can start today.
- Local insight: Oshawa-specific tips based on Bugman Plus field work.
What Is Rodent Exclusion?
Rodent exclusion is the practice of physically blocking rodent entry by sealing gaps, screening vents, and hardening building edges. It targets openings as small as 1/4 inch for mice and 1/2 inch for rats, making your home a closed system so rodents can’t enter, nest, or feed indoors.
Exclusion is prevention, not poison. You harden your home so rodents can’t get in, then use traps or baits only if monitoring finds activity. This aligns with integrated pest management (IPM) and supports safer, more reliable results over time.
- Primary goal: Stop entry before it starts.
- Scope: Foundations, doors, attic/roof vents, soffits/fascia, utility penetrations, crawlspace vents, and garages.
- Benchmarks: Close gaps ≥ 1/4 inch, fit door sweeps flush, and screen all vents with 1/4-inch hardware cloth.
- Outcomes: Fewer droppings, gnaw marks, and noises; reduced food contamination; and less damage to insulation and wiring.
In our experience serving Oshawa homeowners, the fastest wins come from tightening garage doors, sealing utility penetrations, and screening attic vents—these three areas block a large share of first-time entries.
Why Rodent Exclusion Matters
Rodent exclusion matters because it prevents infestations at the source, reduces property damage and contamination, and lowers reliance on chemicals. Homes sealed to 1/4-inch standards experience fewer repeat issues and simpler maintenance with periodic inspections and sanitation routines.
Left unchecked, rodents gnaw insulation and wires, compromise food storage, and contaminate surfaces. Exclusion minimizes these risks by physically denying access.
- Direct prevention: Every sealed gap removes one entry path.
- Asset protection: Fewer chewed wires and damaged insulation (a common winter surprise in garages and attics).
- Health support: Better sanitation and fewer droppings where families prepare meals or store pet food.
- Sustainable control: Less need for repeated interior treatments when the building envelope is tight.
How Rodent Exclusion Works
Rodent exclusion works through inspection, material selection, and precise installation. You identify every hole, crack, and unsealed edge; choose durable materials (steel wool, sealants, hardware cloth, door sweeps); install to tight tolerances; and then monitor with traps or indicators to verify success.
Think of this as upgrading your home’s “perimeter security.” The process is systematic and measurable, which makes quality control easier and results more predictable.
- Inspect: Map all penetrations, vents, and door gaps, inside and out.
- Prioritize: Tackle 1/2-inch or larger openings first, then 1/4-inch gaps.
- Install: Fit screens, sealants, sweeps, and weatherstripping to zero daylight.
- Verify: Use snap traps or monitoring cards for 2–3 weeks to confirm no activity.
- Maintain: Recheck high-risk areas each season, especially fall and early winter.
12 Proven Rodent Exclusion Methods
The most reliable rodent exclusion methods include door sweeps, weatherstripping, steel mesh, polyurethane sealants, and 1/4-inch hardware cloth on vents. Combine these with utility grommets, soffit and fascia repair, chimney caps, and tight garage thresholds to create a continuous, rodent-proof envelope.
Core building upgrades
- Install door sweeps: Close the gap at the bottom of exterior and garage doors; aim for zero daylight.
- Weatherstrip side jambs: Add compressible seals along door sides and headers to remove corner slivers.
- Screen vents with hardware cloth: Use 1/4-inch galvanized mesh on attic, crawlspace, and gable vents.
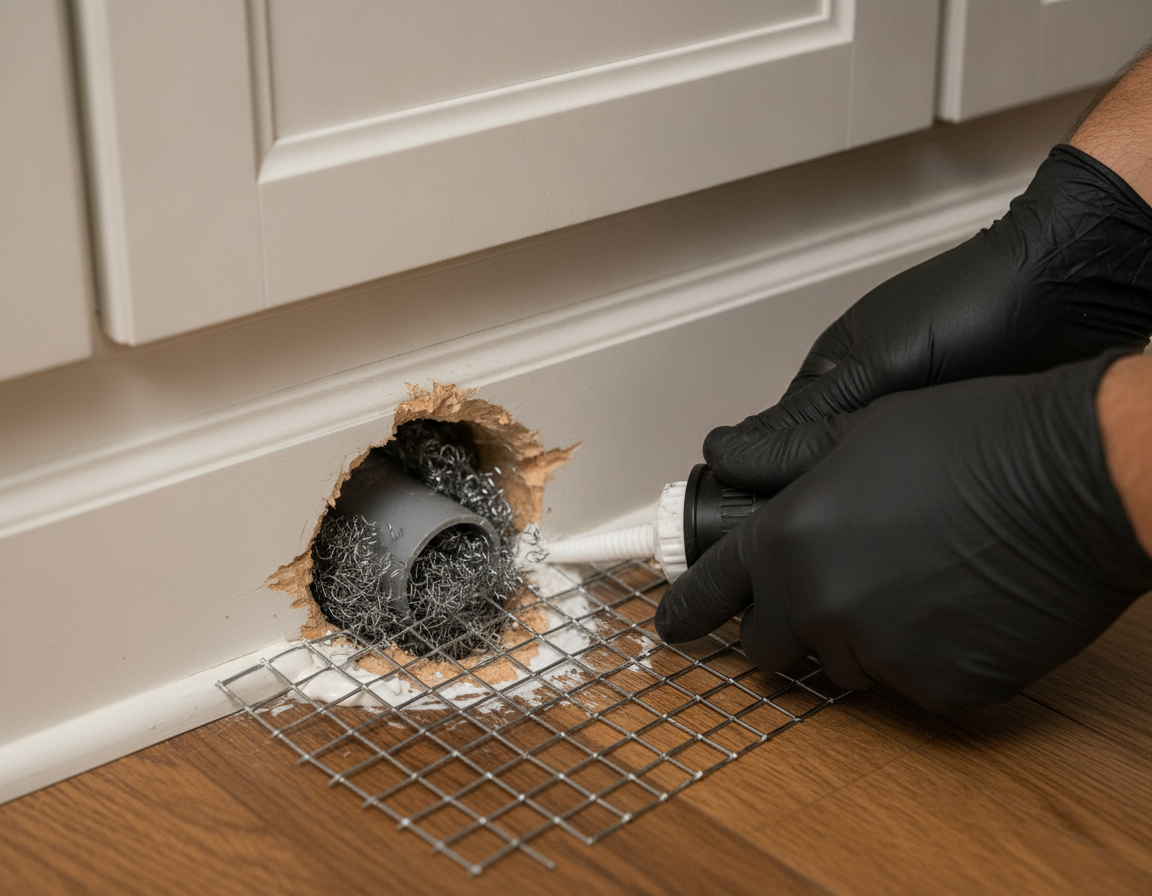
- Seal utility penetrations: Pack steel wool, then cap with exterior-rated sealant around pipes, cables, and conduits.
- Repair soffit and fascia gaps: Replace broken sections and resecure edges that flex in the wind.
- Cap chimneys and flues: Add spark arrestors or caps with mesh that meets 1/4-inch guidance.
Materials that stand up to gnawing
- Stainless or galvanized mesh: 1/4-inch hardware cloth (19–23 gauge) resists chewing and weather.
- Steel wool + sealant: Stuff-grade steel wool blocks irregular gaps; finish with polyurethane or elastomeric sealant.
- Backer rod: For deep cracks, use foam backer to set proper sealant depth and reduce waste.
- Concrete or mortar: Patch foundation cracks and utility sleeves for a permanent fix.
- Metal flashing: Bridge warped edges where wood meets masonry; rivet or screw into place.
- Garage threshold seals: Bond a rubber threshold to close uneven slabs under roll-up doors.
Tip: Match materials to gap size. For example, use backer rod and sealant for 3/8–3/4-inch cracks, and hardware cloth for larger openings that need structure.
| Gap/Opening | Best Material | Why It Works |
|---|---|---|
| 1/4–3/8 inch | Steel wool + polyurethane sealant | Conforms to odd shapes and resists gnawing when sealed over |
| 3/8–3/4 inch | Backer rod + elastomeric sealant | Sets correct sealant depth; flexible, weather-tough finish |
| 3/4–2 inches | 1/4-inch hardware cloth + fasteners | Rigid barrier for larger voids and vent faces |
| Linear door gap | Door sweep + weatherstripping | Eliminates light and airflow paths at thresholds |
Step-by-Step Home Sealing Checklist
Walk your home clockwise, starting at the front door and ending at the garage. Note every gap ≥ 1/4 inch, then fix by priority: doors, utilities, vents, and soffits. Verify at night with a flashlight—if you see daylight, rodents see an entry.
- Doors: Install door sweeps; add side and header weatherstripping; confirm no light leaks.
- Utilities: Seal around AC lines, cable/internet, gas/electric conduits; steel wool first, sealant over.
- Vents: Screen attic, crawlspace, dryer, and gable vents with 1/4-inch hardware cloth (outside the louver).
- Soffit/fascia: Refasten or replace damaged panels; close gutter-line gaps.
- Foundation: Patch cracks and gaps at sill plates; foam alone isn’t rodent-proof—cap with sealant or mesh.
- Garage: Add a threshold seal; adjust tracks so the door seats squarely.
- Basement/utility rooms: Seal pipe chases, sump openings, and gaps around floor penetrations.
- Verification: Place 4–8 snap traps along walls for two weeks to confirm zero captures.
If you prefer a professional walkthrough, our team performs an exclusion-first inspection and documents each fix. You can request service on our services page or get a quote to schedule a visit in Oshawa.
Prefer a pro? Bugman Plus backs interior treatment programs with a 3-month warranty. Book a quick assessment and we’ll map, seal, and verify the fixes that keep rodents out.
Contact our team or learn more about Bugman Plus.
Best Practices for Long-Term Control
The best practices for rodent exclusion combine tight building seals, routine monitoring, and strict sanitation. Inspect seasonally, keep food in sealed bins, and maintain door and vent hardware so small failures don’t reopen entry points.
Maintenance rhythms that work
- Quarterly inspections: Recheck doors, vents, and utilities every 3 months.
- Seasonal focus: Prioritize fall and early winter when outdoor pressure rises.
- Weekly checks for 1 month: After major sealing, run traps or monitors to validate results.
Sanitation that starves interest
- Food control: Store dry goods and pet food in lidded bins; clean under appliances monthly.
- Waste discipline: Use tight-fitting lids; rinse recyclables; avoid overnight organics indoors.
- Yard cues: Trim vegetation back 12–18 inches from the foundation; elevate firewood.
Hardware tune-ups
- Replace worn sweeps: Look for light leaks and frayed rubber at thresholds.
- Tighten vent screens: Refasten any mesh that flexes or rattles in wind.
- Re-seal cured gaps: UV and freeze–thaw cycles can crack sealant; touch up annually.
Local considerations for Oshawa
- Busy shopping corridors near Whitby Mall attract dumpster activity—keep lids tight and sweep seed spills around bird feeders.
- After thaw or heavy rain near Prince of Wales Park, recheck foundation and sill plate gaps; moisture shifts can open seams.
- Older homes in established neighborhoods often have unsealed utility sleeves—plan a utility-by-utility sealing pass before winter.
Prevention-first routines pair well with our warranty-backed interior programs. If monitoring shows new activity, we escalate with targeted controls inside a sealed envelope—fast and trackable.
Tools and Materials You’ll Need
Successful exclusion depends on durable materials and a few reliable tools. Use 1/4-inch hardware cloth, steel wool, quality sealants, and door hardware, plus snips, a drill/driver, and a caulk gun. These basics handle 80–90% of residential rodent-proofing tasks.
Materials checklist
- 1/4-inch galvanized hardware cloth (19–23 gauge)
- Stuff-grade steel wool
- Polyurethane or elastomeric exterior sealant
- Backer rod (various diameters)
- Door sweeps and weatherstripping kits
- Rubber garage threshold seal
- Metal flashing (aluminum or galvanized)
- Chimney cap or spark arrestor
Basic tools
- Tin snips or shears (for mesh)
- Drill/driver with exterior-rated screws
- Caulk gun and utility knife
- Measuring tape and permanent marker
- Flashlight for night leak checks
- Work gloves and eye protection
Case Studies: Exclusion Wins in Oshawa Homes
Exclusion delivers repeatable results. In Oshawa homes we’ve sealed, activity usually drops within 7–14 days as traps show zero captures and food areas stay clean. The key is a full perimeter pass—doors, utilities, vents, soffits—followed by short, weekly checks.
Garage daylight eliminated in a week
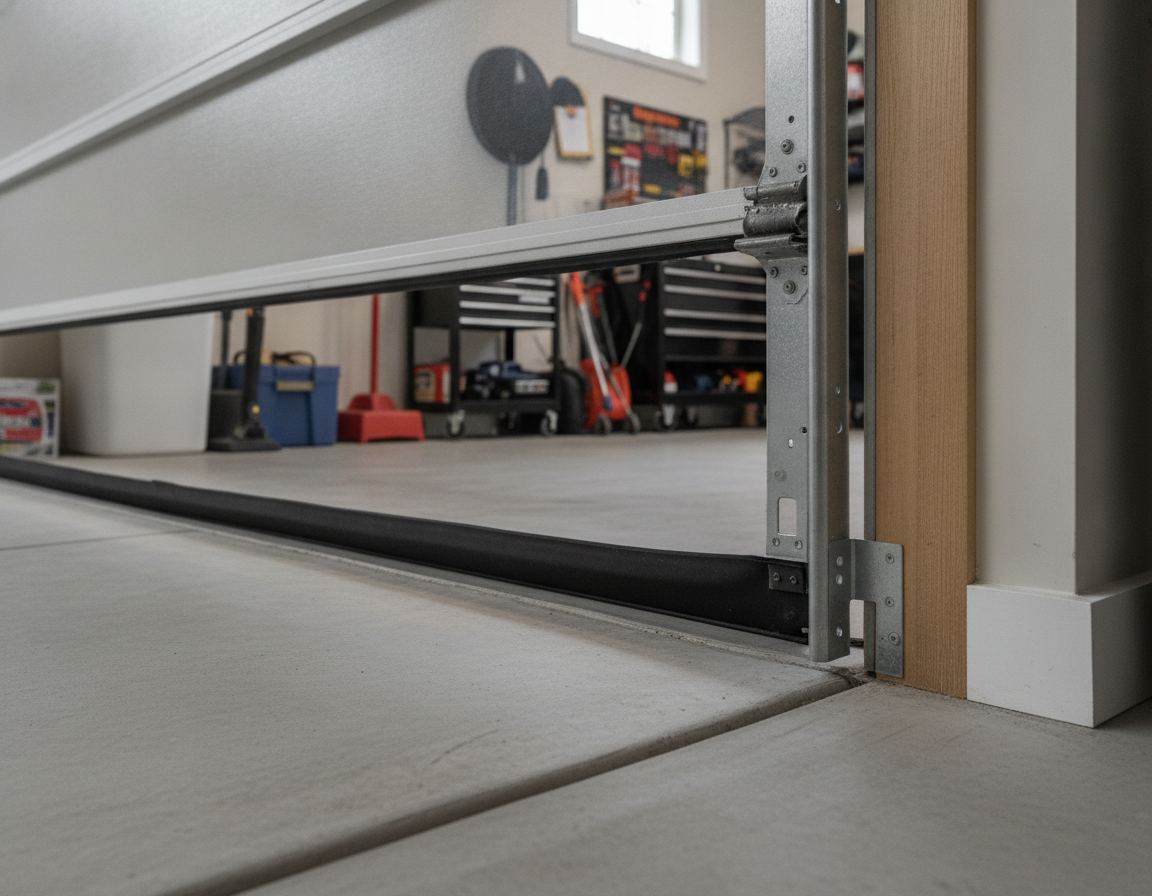
- Problem: Daylight under a roll-up garage door allowed mice in nightly.
- Fix: New bottom sweep, side weatherstripping, and a 1/2-inch rubber threshold.
- Result: Zero captures after day 6; no new droppings by day 10.
Utility penetrations sealed in an older basement
- Problem: Gaps around gas and cable lines; foam-only plugs previously failed.
- Fix: Steel wool packed to depth, backer rod set, polyurethane sealant finished flush.
- Result: No further gnawing; traps quiet by week two.
Attic vent screens upgraded
- Problem: Plastic louver screens cracked; rodents probed gaps at corners.
- Fix: 1/4-inch hardware cloth installed outside the louvers, fastened at studs.
- Result: No scratching sounds after first week; insulation remained intact at 30-day check.
Want a documented, photo-verified exclusion pass? Start on our services page or contact Bugman Plus to book an inspection. We back interior treatment programs with a 3-month warranty for added confidence.
Frequently Asked Questions
Homeowners ask about timelines, materials, and whether traps are still needed. Exclusion first, then verify with monitoring. Expect 7–14 days for activity to taper off when the perimeter is sealed to 1/4-inch standards and sanitation is consistent.
What are the most important rodent exclusion methods?
Focus on door sweeps, weatherstripping, screening vents with 1/4-inch hardware cloth, and sealing utility penetrations with steel wool plus exterior sealant. These four fixes block the majority of entry points in typical homes when installed to a tight, no-daylight standard.
Do I still need traps after exclusion?
Yes—temporarily. Run snap traps or monitors for 2–3 weeks after sealing to confirm zero indoor activity. If you catch rodents, reevaluate for missed gaps. With a tight envelope and good sanitation, traps typically go quiet within 7–14 days.
What mesh size works best on vents?
Use 1/4-inch galvanized hardware cloth (19–23 gauge). It stops mice while allowing airflow and withstands weather. Install outside the louvered vent cover and fasten at solid framing so corners can’t be pried open.
How often should I reinspect my home?
Perform a quick exterior pass each season, with extra attention in fall and early winter. Indoors, recheck utility rooms and basements quarterly. Replace worn door sweeps and resecure any flexing vent mesh to keep the perimeter tight year-round.
Conclusion: Next Steps
Start with the basics: seal 1/4–1/2-inch gaps, screen vents, and harden doors. Verify for two weeks with traps. When the envelope holds, you’ll see activity drop and cleanliness rise—proof your exclusion is working.
- Key takeaways
- Exclusion is prevention-first and reduces repeat infestations.
- Match materials to gap sizes for durable results.
- Seasonal checks and sanitation keep pressure low.
- Monitoring confirms success without guesswork.
- Action steps
- Walk the perimeter this week and list all gaps ≥ 1/4 inch.
- Install door sweeps and screen vents first for the biggest win.
- Book a pro exclusion assessment if you want photo-documented fixes.
Have broader pest issues beyond rodents? Bugman Plus also handles ants, bed bugs, cockroaches, spiders, and wasps with research-driven methods and a service warranty. Explore Bugman Plus, see all services, or request a quote for fast help in Oshawa.


