

A home pest inspection checklist is a structured, room‑by‑room process for finding early signs of insects and rodents before they spread. It includes checking entry points, harborages, food and water sources, and sanitation risks. For Eastdale homeowners, consistent checks paired with fast action reduce damage, protect health, and prevent repeat infestations.
By Bugman Plus • Last updated: June 28, 2026
Quick Summary and Table of Contents
Use this home pest inspection checklist weekly during active seasons and monthly otherwise. Scan exterior gaps, kitchens, bathrooms, bedrooms, basements, garages, and attics. Document findings, correct sanitation, and seal entry points. Call a pro if you see live clusters, widespread droppings, or repeat activity after basic fixes.
Here’s what you’ll learn and use today. Bookmark this guide and work through each section:
- What is a home pest inspection checklist?
- Why routine inspections matter
- How a DIY inspection works (step-by-step)
- Pest types, signs, and approaches
- Best practices that actually work
- Tools and resources
- Buying guide: DIY vs. professional inspection
- Real Eastdale scenarios
- Local considerations for Eastdale
- FAQ
- Conclusion and next steps
- Related topics and guides
What Is a Home Pest Inspection Checklist?
A home pest inspection checklist is a repeatable, room-by-room plan to spot entry points, food and water sources, droppings, frass, nests, and damage. It standardizes what you check and when, so you catch small issues early and decide when DIY steps are enough or when to call a licensed professional.
Think of a checklist as your quality control system for a healthy home. It turns guesswork into a routine: inspect, document, act, and verify. The best lists cover exteriors, high-risk rooms (kitchen, bath), sleeping areas, storage zones, garages, and attics.
- Core goals: find conditions that attract pests; find evidence they’re present; remove access, food, and shelter; and verify results.
- Timing: weekly in warm, wet months; monthly in cold months; immediately after heavy rain or renovations.
- Decision points: DIY fixes for minor, localized issues; professional service for clusters, structural damage, or repeat activity.
At Bugman Plus, we see faster, cleaner outcomes when homeowners keep notes with dates and photos. That record helps our technicians tailor interior treatment programs and confirm success under our 3‑month warranty.
Why Routine Home Pest Inspections Matter
Routine inspections cut off infestations before they multiply, reduce health risks, and protect finishes and wiring. Small entry points—often 1/4 inch or less—invite mice and insects. Checking and sealing them, paired with sanitation fixes, prevents repeat problems and makes any professional treatment work faster.
Inspections matter because pests exploit predictable conditions. Moisture around foundations, crumbs under appliances, cluttered storage, and unsealed gaps are the usual culprits. A checklist forces consistent reviews of these areas so small problems don’t linger for weeks.
- Health protection: Feces, shed skins, and bites trigger allergies and asthma, especially in children and seniors.
- Home protection: Rodents chew wires and insulation; cockroaches spread across kitchens and baths; ants establish satellite colonies when unchecked.
- Faster resolution: When you monitor entry points and sanitation, professional treatments reach targets more quickly and need fewer follow-ups.
We’ve found that families who run a brief weekly walk‑through in spring and summer report fewer emergency calls. When you do need help, a clean record of what you saw and when helps us zero in on the source the same day.
How a DIY Home Pest Inspection Works (Step-by-Step)
Walk the exterior clockwise, then move inside room by room. Use a flashlight, mirror, and notepad. Check gaps, moisture, droppings, and nests. Document with photos, fix sanitation, and seal minor gaps. If activity persists within two weeks, schedule a professional inspection.
Follow these steps to run a thorough, repeatable review. Keep your notes in the same order each time so trends stand out.
- Exterior lap (10–15 minutes)
- Inspect foundation for 1/8–1/4 inch gaps, loose siding, unsealed utility penetrations, and torn screens.
- Check downspouts and grading; standing water invites mosquitoes and ants.
- Look for wasp activity under eaves, soffits, sheds, and fence posts.
- Door and window sweep (5–10 minutes)
- Confirm weatherstripping contact; gaps as thin as a credit card let in small insects.
- Examine door sweeps; replace if daylight shows through.
- Note any frass (fine sawdust) that could indicate wood-boring insects.
- Kitchen scan (10 minutes)
- Pull out or peer under appliances for crumbs, moisture, and roach signs (pepper‑like droppings, egg cases).
- Check sink cabinets for leaks; damp wood invites ants and roaches.
- Store dry goods in sealed containers; label and date to track freshness.
- Bathrooms and laundry (8 minutes)
- Check caulk and grout; seal cracks around tubs and toilets.
- Run fans to reduce humidity; condensation supports silverfish and roaches.
- Inspect floor penetrations for gaps around pipes and conduits.
- Bedrooms (8–12 minutes)
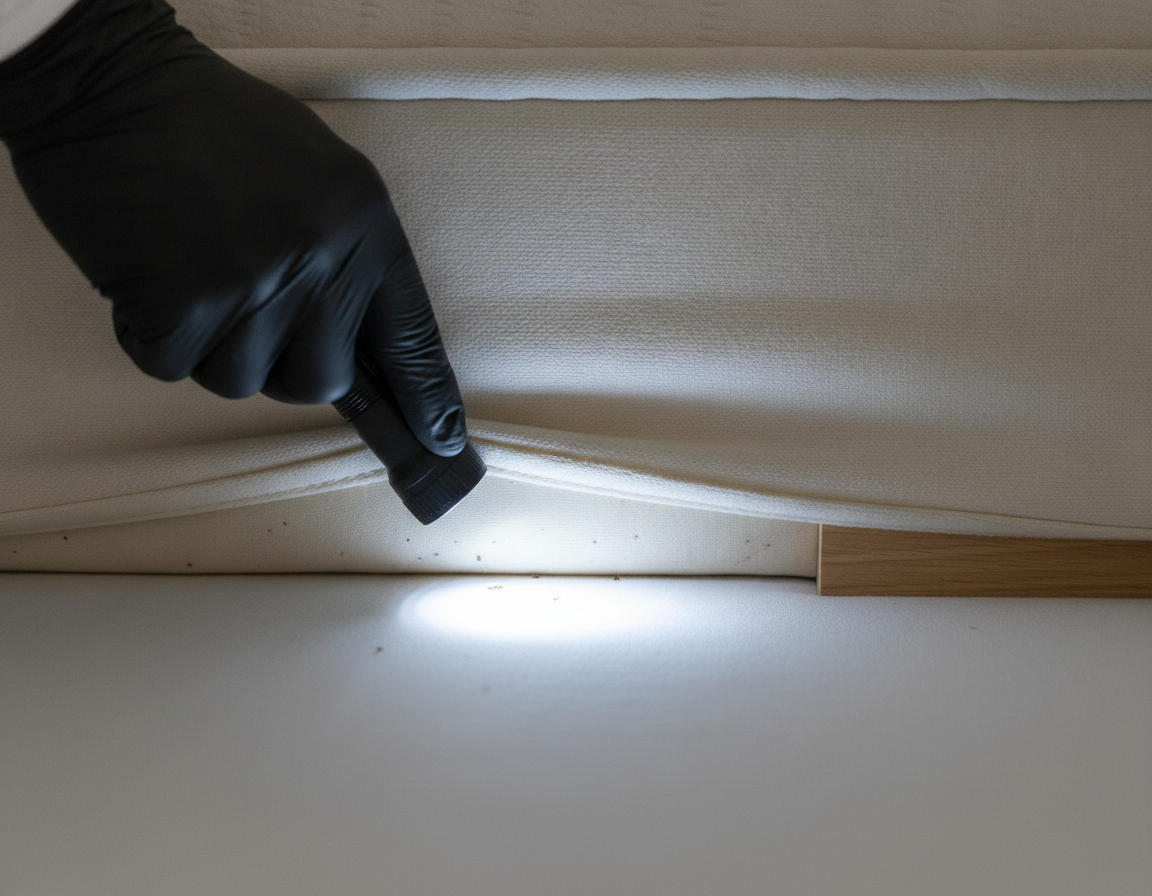
- Lift mattress seams and inspect headboards for bed bug spotting (rust‑colored dots).
- Check baseboards and outlet plates; look for fine droppings or shed skins.
- Reduce under‑bed storage; soft clutter becomes harborage.
- Basements, crawlspaces, attics (12–15 minutes)
- Look for rodent rub marks along joists and pipes; note any 1/4‑inch gaps.
- Inspect insulation for tunnels or nesting; listen for nighttime movement.
- Verify vents have intact screens; seal gaps with hardware cloth.
- Garage and storage (6–8 minutes)
- Elevate firewood and cardboard 18 inches off floors; rotate stock every 30 days.
- Seal pet food in lidded bins; wipe spills promptly.
- Check door seals and thresholds; adjust if you see light.
- Document, act, and recheck (5 minutes)
- Photograph findings; label by room; add measurements where helpful.
- Sanitation fixes first; exclusion (seal and screen) second; baits/traps last and targeted.
- Recheck problem spots after 7–14 days; escalate if activity continues.
If you find multiple pest signs in several rooms, widespread droppings, or structural damage, move from DIY to a professional, warranty‑backed plan. Our services page explains how we tailor interior treatment programs to your findings and schedule.
Pest Types, Signs, and Approaches
Identify the pest first, then match a targeted response. Ants trail to moisture and sweets, cockroaches cluster near water and warmth, rodents follow edges and enter through 1/4‑inch gaps, and bed bugs hide along seams and headboards. Sanitation and exclusion come before any targeted treatment.
Not all pests behave the same, so the checklist emphasizes patterns. Here are the common household categories we handle across Eastdale homes and how to respond.
Ants (including pavement and carpenter ants)
- Signs: soil mounds by foundations, trails to pet bowls, winged swarmers in spring.
- Checklist focus: track trails back to cracks; inspect moisture around sinks and windows; note damaged, damp wood.
- Action: remove food films; dry leaks; seal cracks with silicone; place targeted baits near trails (not on countertops).
Considering long‑term planning? Our team discusses “ant control cost” factors with homeowners so expectations and timelines are realistic, especially if moisture or structural issues complicate control.
Cockroaches (German and American)
- Signs: pepper‑like droppings, egg cases (oothecae), a musty odor, nighttime sightings around appliances.
- Checklist focus: warm, wet zones—dishwashers, fridge motors, sink cabinets, and wall voids.
- Action: deep clean grease films; vacuum cracks; deploy gel baits and insect growth regulators strategically; avoid over‑the‑counter sprays that repel.
Rodents (mice and rats)
- Signs: 1/8–1/4‑inch droppings, gnaw marks, greasy rub trails along walls, scampering sounds at night.
- Checklist focus: exterior gaps at utility lines and garage doors; interior food storage and floor edges.
- Action: seal 1/4‑inch and larger gaps with steel wool and sealant; set snap traps along runways; secure pet food and bird seed.
Bed Bugs
- Signs: bites in linear patterns, rust‑colored spotting on seams, tiny shed skins, live bugs in tufts and headboards.
- Checklist focus: mattress seams, box springs, bed frames, curtain hems, and adjacent outlets.
- Action: isolate beds (no bedding on floors); launder/dry on high heat; use encasements; coordinate professional treatment for full eradication.
Spiders and Wasps
- Signs: webs in corners, egg sacs; paper nests under eaves; ground nests near play areas.
- Checklist focus: soffits, sheds, play structures, fence posts, and garage rafters.
- Action: remove webs and inactive nests; install fine mesh screens; call a pro for active wasp nests to avoid stings.
Other Pantry and Fabric Pests
- Signs: moths near dry goods; beetles in flour; holes in stored fabrics.
- Checklist focus: expired or open packages; closet corners; under furniture.
- Action: discard infested food; vacuum crevices; store items in airtight containers; freeze suspect goods 72 hours.
When you’re unsure about the species, take close photos and note the location and time of day. That information speeds up accurate identification and an effective, targeted plan.
Best Practices That Actually Work
Focus on sanitation, exclusion, and targeted, minimal intervention. Clean food films, fix moisture, and store items in sealed containers. Seal 1/8–1/4‑inch gaps, screen vents, and declutter. When activity persists or spans multiple rooms, coordinate a professional, warranty‑backed interior treatment program.
- Sanitation is step one: grease films and crumbs fuel ants and roaches; wipe under edges, not just surfaces.
- Moisture control: repair leaks within 24 hours; run fans; use desiccant in damp storage areas.
- Exclusion: seal around utility lines, doors, windows, and sill plates; screen attic and crawl vents.
- Storage discipline: elevate cardboard; rotate pantry stock; use clear, lidded bins.
- Targeted tactics: prefer baits and mechanical controls over broad sprays inside living areas.
- Documentation: keep a log with dates, rooms, and actions; it’s your early‑warning system.
Our technicians often arrive to find great DIY work in progress. With your notes and photos, we can move straight to the highest‑impact treatments and verify results under our 3‑month warranty for interior programs.
Tools and Resources
You need a bright flashlight, inspection mirror, gloves, sealants, fine mesh screens, lidded storage bins, sticky monitors, and a simple notebook or app. These basics let you find, document, and fix the most common issues before professional help is required.
- Inspection kit: high‑lumen flashlight; small mirror; gloves; measuring tape; smartphone for photos.
- Exclusion kit: silicone or polyurethane sealant, steel wool, weatherstripping, door sweeps, 1/4‑inch hardware cloth.
- Sanitation kit: degreaser, microfiber cloths, HEPA vacuum for cracks and edges.
- Monitoring: sticky traps near baseboards and under sinks; label with date and location.
- Documentation: a simple home log or a mobile app to record findings and reminders.
Technology can help you stay organized. For example, some homeowners explore mobile pest control app ideas to track room‑by‑room notes and reminders. If you store food long‑term, reading about pesticide testing in food can also inform safer pantry practices. And if you’re curious about industry tech trends, you can skim on‑demand pest app concepts for context on how professionals document service data.
When you’re ready for professional support, start at our services to see how we address bed bugs, spiders/wasps, cockroaches, ants, and rodents, or request a quote for your specific situation.
Buying Guide: DIY vs. Professional Inspection
Choose DIY for light, localized issues and ongoing monitoring. Choose a professional when activity spans rooms, you see structural damage, live clusters, or you’ve tried DIY for two weeks without improvement. Warranty‑backed interior treatment programs provide accountability and measured follow‑ups.
Use this comparison to decide your next move. If in doubt, start a call—good providers talk through findings and timing before any treatment plan.
| Criteria | DIY Inspection | Professional Inspection | When to Choose |
|---|---|---|---|
| Scope | Room‑by‑room checks with basic tools | Whole‑home assessment, instruments, species ID | DIY for routine checks; Pro for multi‑room activity |
| Speed | 30–75 minutes depending on home size | 60–120 minutes with documentation | Pro when time is limited or issues are urgent |
| Accuracy | Good with practice and photos | High—trained eyes, moisture meters, traps | Pro for hard‑to‑identify pests and hidden sources |
| Follow‑up | Self‑scheduled rechecks in 7–14 days | Scheduled visits and verification under warranty | Pro if activity has a pattern or returns |
| Risk | Missing early signs or misidentifying species | Lower—confirmation and targeted plan | Pro for safety concerns (stings, wiring, allergens) |
Pro tip: When you’re comparing options, ask about warranties, documentation, and targeted methods. If you’re in Eastdale, our team at Bugman Plus walks you through what to expect and how to prep, then documents every step so you can see progress.
Free action plan call: Share your notes and photos. We’ll map next steps and, if needed, schedule a warranty‑backed interior treatment program. Start on our Get a Quote page or call the number on our homepage.
Real Eastdale Scenarios (What We See Most)
Most Eastdale calls in spring involve ants trailing from damp soil to kitchens; mid‑summer brings wasp nests under eaves; winter highlights rodent entry near garages. Fast sanitation, gap sealing, and targeted baits solve many cases; multi‑room problems benefit from professional, warranty‑backed programs.
- Spring ant trails: A homeowner recorded morning ant activity to a window seam. After sealing the 1/8‑inch gap and drying a slow sink leak, we set targeted baits. Within two weeks, trail counts dropped to zero and did not return the season.
- Summer wasp surge: An active paper nest formed under a shed roof. We coordinated safe removal and screened the gap. The family now runs a five‑minute eave check each weekend from May to August.
- Fall pantry beetles: Open bulk flour stored in warm cabinets fed a small beetle population. Discarding contaminated goods, freezing new stock for 72 hours, and switching to airtight bins ended sightings.
- Winter rodent entry: Daylight through a garage door corner told the story. We adjusted the door, sealed utility penetrations with steel wool and sealant, and installed a door sweep. Monitors stayed clear for the next 30 days.
- Bedroom bed bug catch: Weekly seam checks found early spotting. We isolated the bed, laundered bedding on high heat, and coordinated a structured interior treatment program—results confirmed with follow‑up inspections.
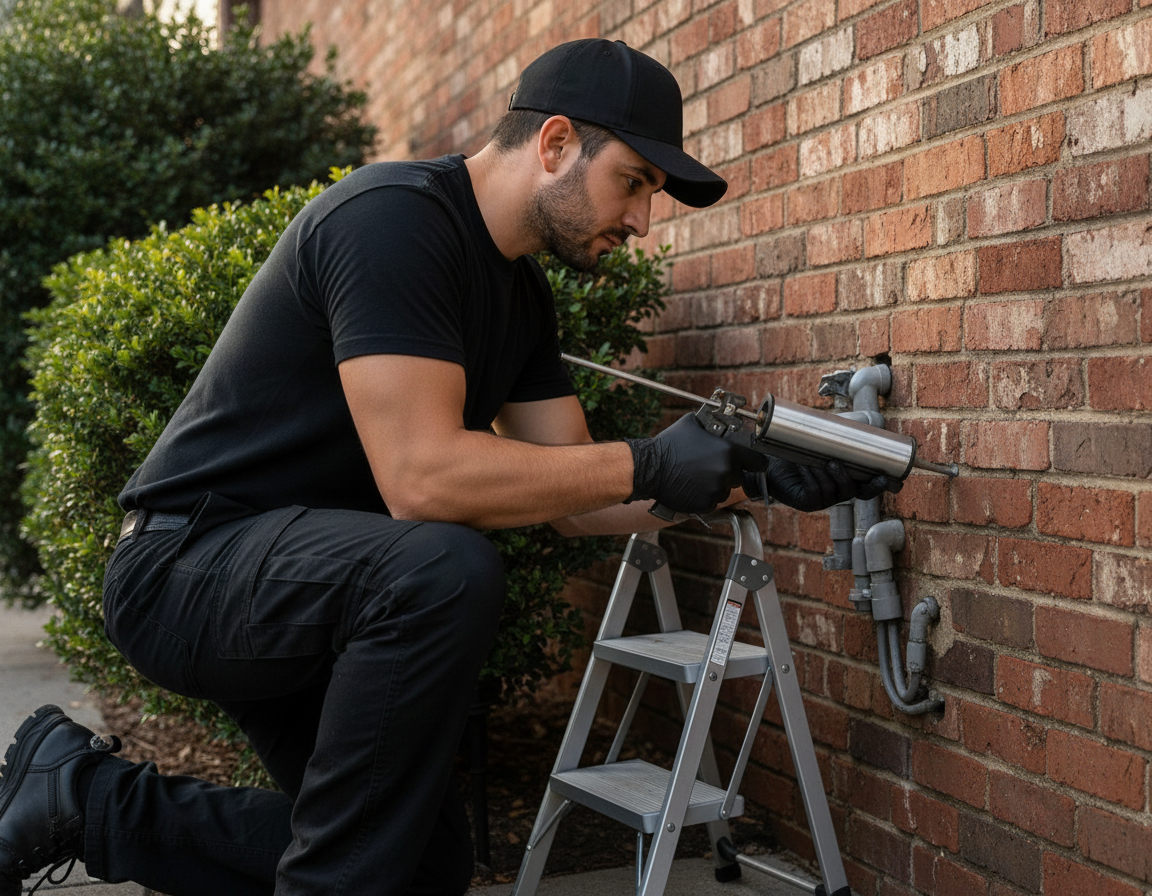
These snapshots reflect a simple pattern: document, correct conditions, seal entries, and confirm with rechecks. When activity persists or spreads, involve a licensed team to accelerate control and provide verification.
Neighborhood Notes for Eastdale Homes
Eastdale’s mix of mature trees, sheds, and seasonal moisture creates ideal conditions for ants, wasps, and rodents. Watch eaves and sheds in summer, soil moisture in spring, and garage entries in winter. A short, weekly exterior lap prevents most surprises.
Local considerations for Eastdale
- After rain, inspect garden borders along paths to Woodview Park; damp soil near foundations can drive ants indoors—dry the area and reseal hairline cracks.
- Summer weekends near Easton Park mean more backyard time—scan eaves and play structures for wasp paper nests before gatherings.
- Garages facing prevailing winds often show corner light gaps by December; adjust door tracks and add sweeps to block rodent entry.
When in doubt, snap photos and note time of day. That quick detail helps us match likely species and advise whether DIY steps or a professional visit is best.
Frequently Asked Questions
You can run a 30–60 minute pest inspection at home using a flashlight, mirror, and basic tools. Focus on exterior gaps, moisture, kitchens, baths, bedrooms, storage, and attics. Recheck hot spots in 7–14 days and call a pro if activity spreads or returns.
How often should I use a home pest inspection checklist?
Run it weekly during warm, wet months and monthly during colder months. Recheck hot spots after heavy rain, renovations, or travel. If you document new activity for two weeks without improvement, it’s time to call a licensed professional for a deeper assessment.
What are the first places to check inside?
Start with the kitchen (under and behind appliances, sink cabinets), then bathrooms, then bedrooms (mattress seams and headboards). Finish with basements, attics, and garages. These areas supply food, warmth, and moisture—conditions most pests seek out.
When should I skip DIY and hire a professional?
Call a pro when you see activity in multiple rooms, structural damage, widespread droppings, or stinging insect nests. Also reach out if DIY steps haven’t helped in 7–14 days. A structured, warranty‑backed plan brings targeted methods and scheduled follow‑ups.
What tools do I need for a basic inspection?
Use a bright flashlight, a small inspection mirror, gloves, sealant, weatherstripping, sticky monitors, and a notebook or app for photos and notes. These let you find and fix most minor problems and help a professional zero in faster if needed.
Does a checklist replace professional service?
No. A checklist helps you catch small issues and keep conditions unfavorable to pests. Professional service adds species identification, specialized tools, and interior treatment programs with documentation and a warranty to confirm results over time.
Conclusion and Next Steps
Make your home pest inspection checklist a routine practice: inspect, document, fix, and verify. Most minor issues resolve with sanitation and exclusion. Persistent or multi‑room activity calls for a professional, warranty‑backed plan that documents progress and holds the system accountable.
- Key takeaways:
- Run weekly checks in warm months; monthly otherwise.
- Sanitation and moisture control drive faster results.
- Seal 1/8–1/4‑inch gaps; screen vents and adjust door sweeps.
- Escalate when activity spreads or persists beyond 14 days.
- Documentation accelerates effective, targeted treatment.
- Action steps:
- Download or print this list; set calendar reminders.
- Create a room‑by‑room photo log with dates.
- Build a small sanitation and exclusion kit.
- Share notes with our team for a tailored interior program.
Ready for backup? Start with our service overview, contact our team, or request a quote. We’re committed to “winning the war on pests” with a clear plan and a 3‑month warranty on interior treatment programs.
Related Topics and Guides
Explore how inspections connect to control: sanitation, exclusion, monitoring, and targeted treatment form a system. Understanding each part helps you decide when DIY is sufficient and when a professional plan with documented follow‑ups is the smarter path.
If you’re researching next steps, read up on identification basics, storage best practices, and seasonal prevention. For ants specifically, understanding long‑term planning and “ant control cost” considerations helps align timelines and expectations when structural or moisture issues exist.


