
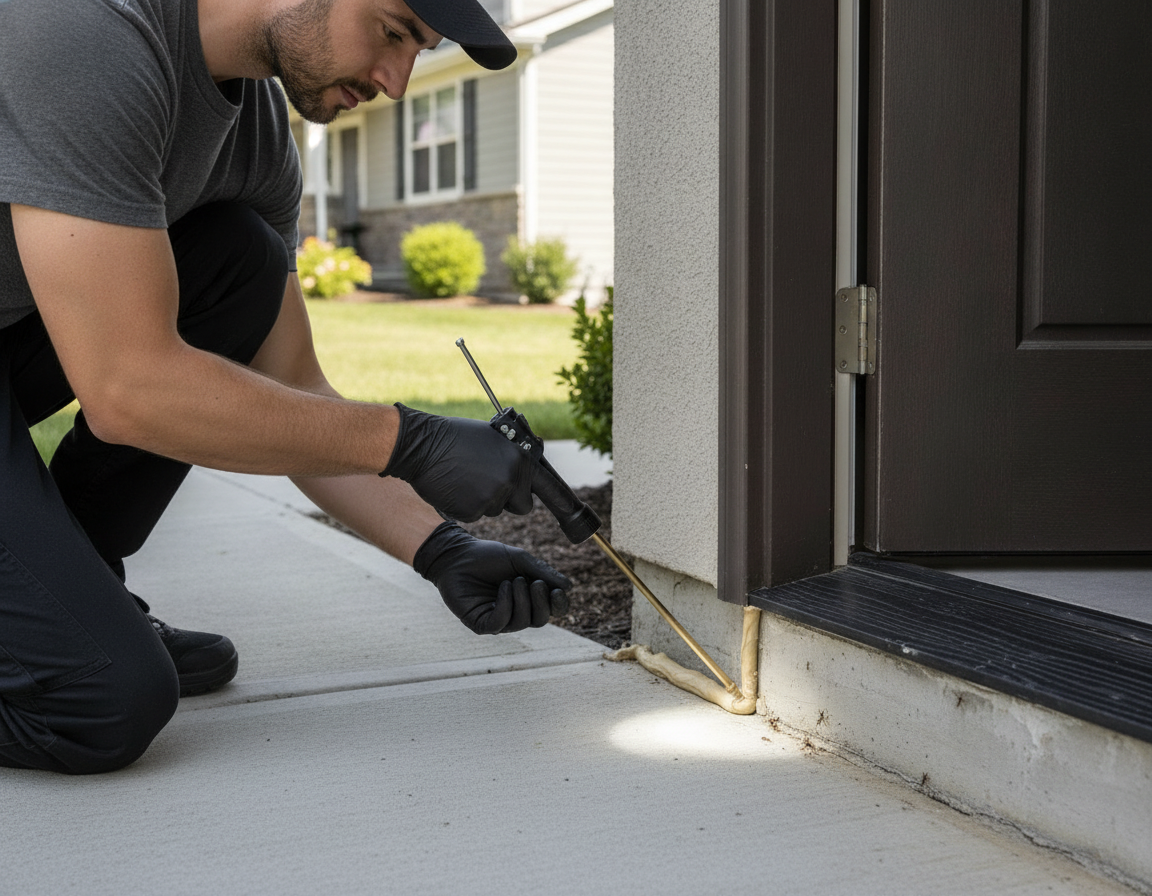
Ant control entry point sealing is the targeted process of finding and closing the tiny gaps, cracks, and utility penetrations ants use to enter a home. Done correctly, it blocks trails within 24–48 hours and reduces indoor sightings by cutting off access. In Eastdale, sealing pairs with treatment to deliver lasting results.
By Bugman Plus · Last updated: 2026-06-27
At a Glance
Entry point sealing stops ants by closing the small openings they exploit. This quick overview lists what you’ll learn, why sealing matters in Eastdale, and how to follow a proven, inspection-first process that pairs with professional treatments for durable control under a 3‑month warranty.
If you’re seeing ant lines across baseboards or finding them under sinks, sealing is your fastest prevention win. In this complete guide, we’ll show you how Bugman Plus blends inspection, targeted sealing, and interior treatment to “win the war on pests.”
- What ant control entry point sealing is—and how it works alongside treatment
- Where ants actually get in (doors, windows, siding seams, utility lines)
- Which sealants and barriers to use (silicone, polyurethane, copper mesh, door sweeps)
- Step-by-step sealing checklist for kitchens, baths, basements, and exteriors
- Best practices for spring moisture and summer trail surges in Eastdale
- When to call Bugman Plus for warranty‑backed interior treatment programs
What Is Entry Point Sealing for Ant Control?
Entry point sealing for ant control is the systematic inspection and closure of gaps ants use to access living spaces. It complements baits and non-repellent treatments by removing highways into your home, improving results and reducing callbacks in as little as one visit.
Sealing is more than squeezing caulk into a crack. It’s an inspection-driven protocol that maps trails, identifies moisture and food sources, and then closes structural routes. Most common household ants can exploit openings around 1/16–1/8 inch; a focused seal blocks those paths quickly.
- Goal: Break access points so trails collapse within 1–2 days.
- Scope: Doors, windows, siding seams, foundation gaps, utility lines, vents, sill plates, and under-sink penetrations.
- Result: Fewer indoor sightings, faster bait acceptance outdoors, and longer intervals between re-infestations.
At Bugman Plus, sealing is integrated with targeted interior treatments. This combined approach aligns with our 3‑month warranty on interior programs and our promise to apply the right time, practice, and product for reliable outcomes.
Why Sealing Matters in Effective Ant Control
Sealing matters because it removes the physical openings ants need. Without gaps, colonies waste foraging time, indoor trails collapse, and chemical treatments work more efficiently. Homes with sealed penetrations report fewer resurges across spring and summer cycles.
Ant foraging is efficient: dozens of workers can map a kitchen within hours, placing pheromone trails through baseboard seams and pipe chases. Remove the pass-throughs, and the foraging loop breaks. In practice, we see indoor sightings drop rapidly once obvious entry points are closed and food residues are reduced.
- Moisture factor: Even a small drip can draw ants from 30–50 feet away. Dry leaks and seal gaps to remove the attractant and the access.
- Temperature swings: On hot afternoons, wall-void temperatures can exceed 90°F; sealed homes limit heat-driven migrations indoors.
- Trail dynamics: A single unsealed cable hole or door sweep gap (1/8 inch) can sustain repeat incursions—even after baiting.
Sealing is not a substitute for treatment when colonies are established, but it multiplies the impact of baits and non-repellent sprays by controlling where ants can and cannot move.
How Entry Point Sealing Works (Step Logic)
Entry point sealing works by inspecting, mapping ant activity, prioritizing gaps by size and location, and closing them with the right material. The method funnels ants to targeted areas outdoors where baits and non-repellents finish the job.
Here’s the logic that makes sealing effective with interior treatment programs at Bugman Plus:
- Inspect: Walk the exterior in a 360° loop; scan the interior level-by-level. Note trails, frass, moisture, and food residues.
- Prioritize: Close 1/8–1/4 inch openings first—door sweeps, thresholds, utility lines—then move to hairline cracks.
- Match materials: Use silicone or polyurethane outside; acrylic latex inside; pack copper mesh or steel wool for larger voids.
- Verify: Re-check 24–48 hours later; confirm trail collapse and bait acceptance outdoors.
When sealing reroutes ants outdoors, you protect kitchens, baths, and bedrooms while enabling precise placement of treatments where they’re most effective.
Ant Control Entry Point Sealing: Materials, Methods, and Where to Use Them
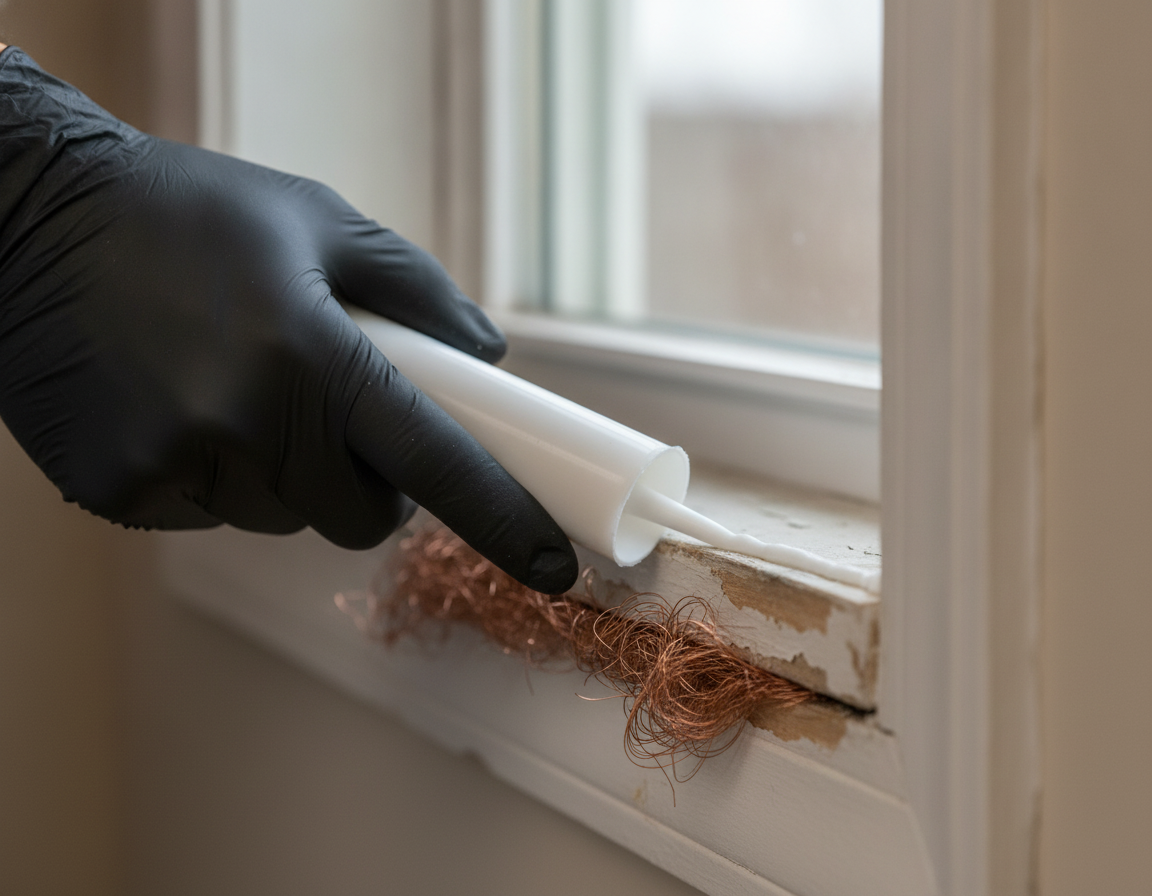
Effective ant control entry point sealing combines flexible sealants, physical barriers, and fitted hardware. Use silicone or polyurethane for exterior gaps, acrylic latex indoors, copper mesh or steel wool for larger holes, and door sweeps or weatherstripping to close thresholds.
Choosing the right barrier for the right gap is what creates durable results. Here’s a quick comparison you can reference while you work with our team.
| Gap/Problem | Best Material | Placement Tip | Typical Longevity |
|---|---|---|---|
| Door bottom gap (1/4–1/2 in) | Aluminum door sweep with rubber fin | Trim to width; ensure even floor contact | 3–5 years |
| Foundation hairline crack | Exterior-grade silicone | Clean, dry; backer rod if >1/4 in depth | 5–10 years |
| Utility line penetration | Copper mesh + polyurethane | Pack mesh first; seal over top | 5+ years |
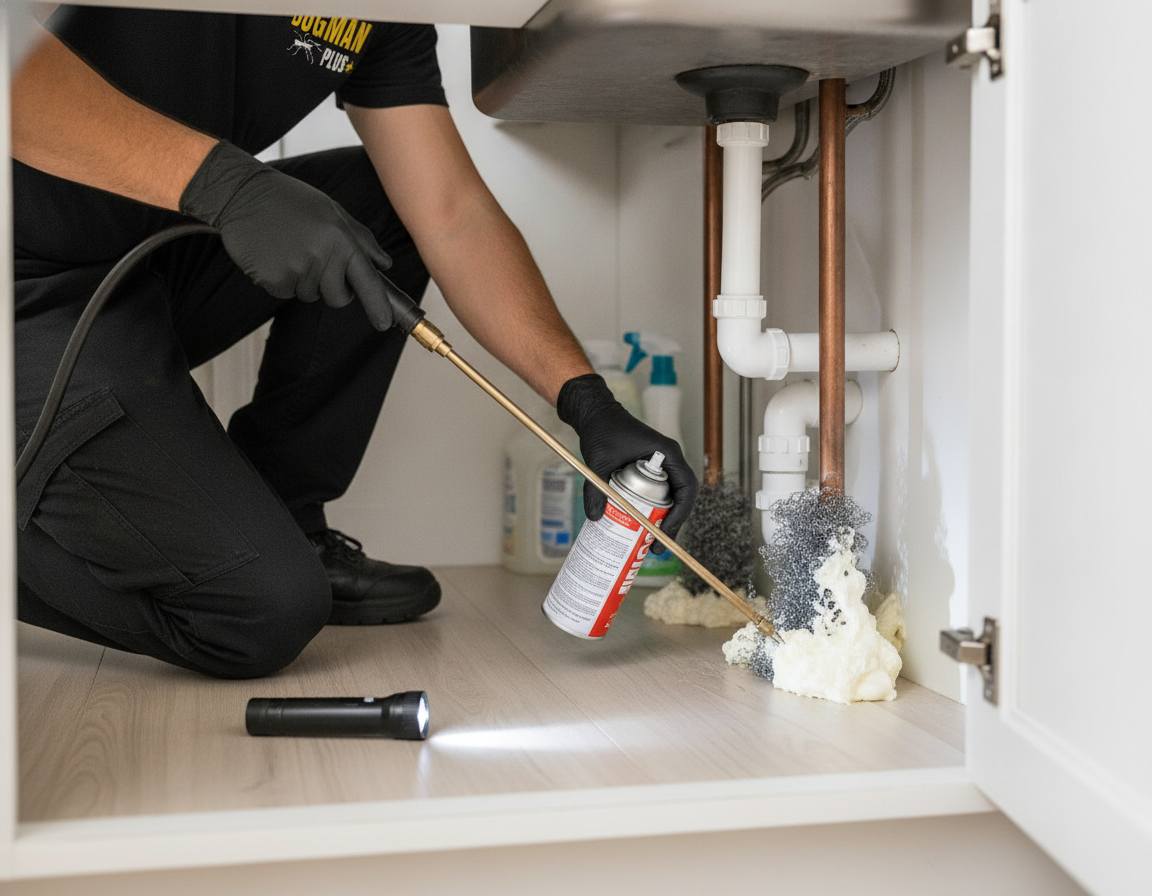
| Under-sink pipe chase | Steel wool + acrylic latex | Fill void; finish with smooth bead | 3–5 years |
| Window frame gap | Paintable acrylic latex | Tool bead; paint after curing | 3–7 years |
| Sill plate gap | Expanding foam (minimal) | Protect wiring; trim excess | 4–6 years |
Homes settle over time—gaps can widen by millimeters each season—so plan a quick checkup every 6–12 months, especially after freeze-thaw cycles or heavy rains.
Where Ants Actually Get In (Interior and Exterior)
Ants get in through repeat offenders: door thresholds, missing sweeps, window frame gaps, siding-to-foundation seams, cable and AC penetrations, and under-sink pipe chases. Close these first to reduce indoor sightings quickly.
Exterior hotspots
- Thresholds and garage doors: Even a 1/8-inch gap can carry a steady stream of workers.
- Siding seams and weep holes: Check where siding meets foundation; look for soil tubes and frass.
- Utility lines: Internet, cable, gas, and AC lines often leave 1/4-inch voids—pack with copper mesh first.
- Foundation cracks: Hairline today can be 1/8 inch by mid-summer; seal while it’s small.
Interior hotspots
- Kitchens: Under-sink pipe penetrations, dishwasher lines, and toe-kick seams attract foragers within hours of a spill.
- Bathrooms: Tub and vanity lines, especially where caulk has pulled back 1–2 mm.
- Basements: Sill plates and rim joists; look for daylight leaks and dust trails.
As we detail during a home visit, these areas typically account for 80–90% of entry routes; tackling them first accelerates results from our treatments.
Step-by-Step Sealing Checklist (Homeowner + Pro Workflow)
Follow this 10-step checklist to inspect, prep, and seal common ant entry points. Prioritize 1/8–1/4 inch gaps, match materials to locations, and re-check in 24–48 hours. Pair with targeted treatments for durable results.
- Walk the exterior: 360° perimeter in daylight; mark 6–12 suspect spots with painter’s tape.
- Scan kitchens and baths: Check under sinks, dishwashers, and toe-kicks; wipe food residues.
- Measure gaps: Note anything 1/16–1/4 inch; larger voids need backing (copper mesh/steel wool).
- Dry and clean: Wipe moisture; vacuum dust so caulk adheres.
- Back and seal: Pack mesh, then apply silicone (exterior) or acrylic latex (interior).
- Install door sweeps: Fit snug; no light visible under the door.
- Weatherstrip: Add V-strip or foam tape to leaky frames.
- Foam larger voids: Use minimal-expanding foam at sill plates; trim after cure.
- Verify after 24–48 hours: Look for collapsed trails; refresh any missed beads.
- Schedule professional treatment: Have Bugman Plus apply targeted interior treatments and set follow-up.
Want help prioritizing? Our services overview explains how we integrate sealing with interior treatment programs and a 3‑month warranty for added peace of mind.
Best Practices: Make Seals Last Through Eastdale’s Seasons
Make seals last by matching materials to location, sealing on a dry day above 50°F, and rechecking every 6–12 months. Focus on moisture control under sinks and along foundations where small leaks and soaked soil invite ants indoors.
Material and timing tips
- Dry-day rule: Aim for 24 rain-free hours; sealants skin over in 30–60 minutes but need a full day to cure.
- Right product, right place: Silicone or polyurethane for exterior; acrylic latex where you’ll paint indoors.
- Backer materials: Use copper mesh or steel wool when voids exceed 1/4 inch so beads don’t sink.
- Moisture control: Fix drips; a single slow leak can sustain foraging for weeks.
Local considerations for Eastdale
- After spring rains or yard irrigation near Woodview Park, inspect foundation-to-siding seams; saturated soil pushes ants to higher, drier entry routes.
- Summer trail spikes often follow weekend barbecues; wipe patios and thresholds the same day, especially if you’re east of Easton Park where tree cover keeps surfaces damp.
- During freeze–thaw, check door sweeps and weatherstripping; repeated temperature swings can open 1–2 mm gaps by late winter.
In our experience working across Oshawa neighborhoods like Eastdale, a seasonal 15–30 minute check prevents the majority of repeat entries we’re called to address in peak months.
Tools and Resources We Trust
You’ll succeed faster with a small, reliable kit: caulk gun, silicone and acrylic latex sealants, copper mesh, steel wool, minimal-expanding foam, door sweeps, weatherstripping, utility knife, isopropyl alcohol, rags, and painter’s tape.
- Essentials: Quality caulk gun, cut tip at 45°, steady bead 1/8–3/16 inch for most frames.
- Prep aids: Alcohol for wipe-downs; painter’s tape to mask straight lines and to mark inspection hits.
- Hardware: Door sweeps and V-strip weatherstripping; measure twice for a draft-tight fit.
- Safety: Gloves and eye protection; foam and polyurethane are sticky and expand quickly.
If you prefer a professional to assemble and apply materials, request a visit through our get a quote page. We combine sealing with interior treatments for efficient, warranty‑backed results.
Home maintenance checklists often pair sealing with HVAC filter changes and leak checks. See this homeowner guide on tackling summer AC issues for timing ideas you can bundle into one weekend.
How Bugman Plus Integrates Sealing with Treatment
We inspect, seal strategic gaps, and apply targeted interior treatments where they do the most good. This integrated approach cuts off access, reduces indoor sightings quickly, and is supported by a 3‑month warranty on interior programs.
- Inspection-first: We map trails and moisture, then create a sealing and treatment plan that targets 6–12 high-impact spots.
- Interior focus: Kitchens, baths, basements—precise applications complement physical barriers.
- Warranty support: Our interior treatment programs include a 3‑month warranty for added confidence.
Learn more about our approach and team on the About Bugman Plus page, or reach our technicians directly through Contact. If you’re evaluating broad pest needs, our home page summarizes all residential services in one place.
Case Studies: Eastdale Home Scenarios
These brief scenarios show how sealing plus treatment stops repeat incursions. Each case pairs a few high-impact seals with targeted interior applications to produce fast, durable results in typical Eastdale homes.
Case 1: Under-sink trail collapse in 48 hours
A two-story home reported steady kitchen ant lines. We found a 3/16-inch gap around the drain pipe and a slow P-trap drip. Result: steel wool backing plus acrylic latex, drip fixed, and a precise interior application. Trails disappeared within two days.
Case 2: Threshold sweep ends garage-to-pantry incursions
A missing garage door sweep left a 1/4–3/8 inch daylight band. We installed an aluminum sweep, sealed a cable hole with copper mesh and polyurethane, and applied interior treatment points. Pantry sightings dropped to zero by the weekend.
Case 3: Siding seam + utility line fix
Workers trailed from mulch to a siding-to-foundation seam and internet cable hole. We cleaned the seam, laid a silicone bead, packed copper mesh, and sealed with polyurethane. Outdoor baiting completed the loop; no indoor activity on the 7‑day follow‑up.
For broader home readiness, some property checklists pair pest-proofing with building upkeep. Here’s a seasonal repair checklist example you can adapt for your home calendar.
DIY vs. Pro: When to Call Bugman Plus
Handle small gaps yourself if you’re comfortable with a caulk gun and door hardware. Call a pro when you see recurring trails, moisture issues, inaccessible voids, or multiple species. Integrated sealing plus treatment saves time and frustration.
- DIY-friendly: Window/door frames, small foundation hairlines, under-sink pipe collars.
- Pro-needed: Multiple wall-void sources, attic or crawlspace access, heavy moisture, or recurring spring/summer resurges.
- Bonus: Pros can spot related risks (wasp gaps, rodent rub marks) and address them in the same visit.
Already tried baits and sprays without lasting relief? Pair sealing with precise applications through our services overview and get a quote to schedule a visit.
Frequently Asked Questions
These concise answers cover how sealing fits into ant control, what materials to use, and how often to recheck gaps. Each reply is designed for quick reading and voice assistants.
What is ant control entry point sealing?
It’s the process of inspecting and closing gaps, cracks, and penetrations ants use to enter a home. Sealing complements baits and non-repellent treatments by removing highways indoors, which shortens trails and improves results.
Which sealant works best for exterior gaps?
Use exterior-grade silicone or polyurethane for weather-exposed areas. Pack larger voids with copper mesh first, then seal overtop. Indoors, use paintable acrylic latex so you can finish cleanly.
How soon will I see fewer ants after sealing?
Most homeowners notice fewer indoor trails within 24–48 hours, especially when sealing is paired with targeted treatments and basic sanitation like wiping up food residues and fixing small leaks.
Do I still need professional treatment if I seal gaps?
Yes, if a colony is established. Sealing blocks new entries, but baits and non-repellents are needed to suppress colonies. Our integrated service combines both under a warranty-backed program.
How often should I recheck seals?
Inspect every 6–12 months and after major weather swings. Freeze–thaw cycles, heavy rain, or foundation settling can open 1–2 mm gaps that invite new ant activity.
Key Takeaways
Seal first, then treat precisely. Focus on the 10 high-probability gaps, match materials to locations, and recheck seasonally. Integrated service delivers durable control and fewer resurges.
- Ant control entry point sealing closes the tiny routes most ants use—often 1/16–1/8 inch gaps.
- Door sweeps, window seals, utility penetrations, and under-sink chases are top priorities.
- Combine sealing with professional interior treatments for faster, longer-lasting relief.
- Schedule seasonal checks; small weather shifts can reopen gaps by a few millimeters.
Next Steps with Bugman Plus
Ready to stop the trails? Book an inspection. We’ll map activity, seal strategic gaps, and apply targeted treatments—then stand behind the work with our interior program warranty.
For integrated ant, cockroach, spider/wasp, or rodent needs, start at our services overview. Want personalized scheduling? Visit get a quote or call our team. Curious about our story and quality standards? See About Bugman Plus. For general outreach, head to Contact.
If you’re comparing prevention investments, remember: blocking access now reduces rework later. For deeper planning, browse our home page and ask about how sealing pairs with our warranty-backed interior programs. Homeowners researching overall ant control cost can also discuss options during the visit.
Mid-article tip: Planning a weekend project? Bundle sealing with basic maintenance. For inspiration on home upkeep timing, explore a local home care tech roundup that shows how people coordinate checklists on their phones.


